
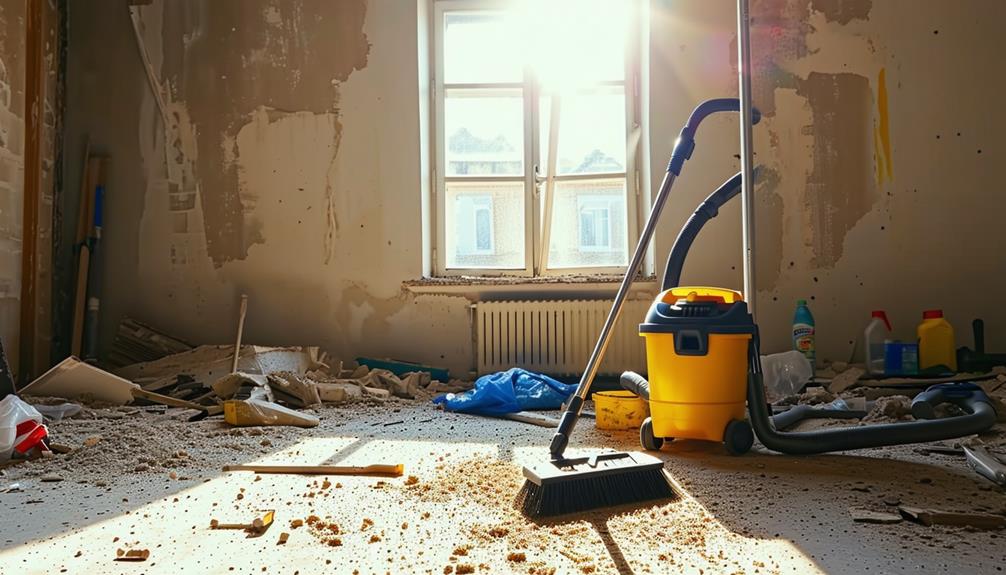
When it comes to cleaning up after builders, we've all faced the intimidating task of transforming chaos into order. It's not just about removing debris; it's about ensuring every corner shines and no dust lingers in the air. We need the right supplies, from safety gear to heavy-duty cleaning tools. But where do we start, and how can we be certain we've covered everything? It's vital to approach this systematically, but there's a significant step that often gets overlooked. Let's explore how to make sure nothing is left behind in the aftermath of construction.
Key Takeaways
- Wear safety gear, including hard hats, protective glasses, gloves, and dust masks, to ensure personal protection during cleanup.
- Sort and dispose of construction debris using heavy-duty bags and dumpsters, adhering to local regulations.
- Use HEPA-filter vacuums and microfiber cloths to remove dust, cleaning from top to bottom.
- Clean windows with warm water, mild soap, and a squeegee, ensuring streak-free results.
- Conduct a final inspection with a checklist to address overlooked areas and imperfections for a spotless finish.
Gather the Necessary Supplies
To efficiently clean up after builders, let's start by gathering the necessary supplies. We need to guarantee our safety first, so donning appropriate safety gear is vital. Hard hats, protective glasses, gloves, and sturdy footwear will shield us from unexpected hazards.
Dust masks are invaluable when dealing with fine particles that linger after construction work. By preparing properly, we maintain our health and stay in control of our environment.
Next, we should focus on collecting reliable cleaning tools. A heavy-duty broom is perfect for sweeping up loose debris, while a vacuum with a HEPA filter can tackle finer dust.
Microfiber cloths come in handy to wipe down surfaces without leaving streaks. For stubborn residues, a versatile cleaning solution will work wonders.
Let's not forget heavy-duty disposal bags, essential for efficiently containing and removing waste materials. These bags should be durable enough to handle sharp objects and large volumes.
Remove Construction Debris
With our supplies ready, we can now tackle the task of removing construction debris. It's vital to approach this methodically to guarantee efficient debris disposal and reclaim our space.
First, let's sort the construction waste. Separate materials like wood, metal, and drywall. Sorting not only makes disposal easier but can also identify items that might be reused or recycled, aligning with our commitment to sustainability.
Next, we should use heavy-duty garbage bags for smaller debris, making sure they're not overloaded. For larger materials, consider renting a dumpster, which provides ample room for bulky items and keeps our site organized.
As we gather the debris, let's remember to wear our protective gear—gloves, safety goggles, and masks—to keep ourselves safe from sharp edges and hazardous dust.
Before we dispose of the waste, check local regulations for debris disposal. Some areas have specific rules about what can be thrown away or need to be taken to a designated facility. By adhering to these guidelines, we avoid fines and contribute positively to our community.
With careful planning and execution, we can clear away the remnants of construction, paving the way for the next phase of our project.
Address Dust and Dirt
Dust clouds and dirt layers are inevitable companions of any construction project, and addressing them is essential for restoring our space to a livable condition.
Let's explore effective dust management and dirt prevention methods to make our environment clean and inviting again.
First, we should start by opening windows and doors to increase ventilation, allowing dust particles to disperse naturally.
Using HEPA-filter vacuums, we can efficiently capture fine particles that settle on floors, furniture, and other surfaces.
It's vital to move methodically from top to bottom, ensuring we don't reintroduce dust into already cleaned areas.
Mopping floors with a damp mop helps trap remaining dust, and for hard-to-reach corners, microfiber cloths will be our best allies.
They attract and hold onto dust particles, preventing them from floating back into the air.
For dirt prevention, let's implement walk-off mats at entrances to catch debris before it spreads.
Clean Windows and Glass
Having completed our dust and dirt management, it's time to turn our attention to cleaning windows and glass surfaces, which often bear the brunt of construction debris.
We start with a thorough inspection to identify areas needing special care. Glass maintenance requires a gentle touch, so we gather our supplies: a bucket of warm water, a few drops of mild dish soap, and a soft squeegee.
First, we remove any loose debris from the windowsills and frames using a soft brush or a vacuum with a brush attachment. This prevents scratching the glass during the window cleaning process.
Next, we dip a microfiber cloth into our soapy solution, wring it out, and gently wipe down the glass. A microfiber cloth works wonders for lifting dirt without leaving streaks.
With the glass damp, we use the squeegee, starting at the top corner and pulling down in a smooth, straight line. We wipe the blade with a clean cloth after each pass to avoid streaks.
Tackle Stains and Splatters
After the dust settles, addressing stains and splatters becomes our next priority. We start by evaluating the areas affected by paint, plaster, or adhesive residue. Identifying the type of stain allows us to choose the most effective removal method.
For paint removal, we apply a solvent appropriate for the surface—water-based solutions for water-based paints and mineral spirits for oil-based ones. It's essential to test a small, inconspicuous spot first to guarantee we don't damage the material.
Surface protection is equally important as we tackle these stubborn spots. We lay down protective coverings on surrounding surfaces to prevent further contamination. Using painter's tape, we secure these coverings in place, ensuring a secure barrier.
When dealing with splatters, we employ plastic scrapers or old credit cards to gently lift dried material without scratching the surface. For more delicate surfaces like wood or stone, we use a soft cloth dipped in a mild detergent solution, applying it gently to avoid abrasion.
We work methodically, focusing on one area at a time, ensuring thorough cleaning without haste. By doing so, we reclaim our space, restoring its pristine condition and embracing the freedom to enjoy it once more.
Final Touches and Inspections
As we approach the final stages of our cleanup, attention to detail becomes vital in guaranteeing a spotless finish. This is where our methodical side truly shines.
We begin by creating a thorough checklist that captures every corner and crevice of the space. Items on this checklist should include checking for leftover dust, smudges on glass surfaces, and any stray materials left behind. By systematically working through this list, we guarantee nothing is overlooked.
Once our checklist is ready, we prepare for the final walkthrough. This step is essential as it allows us to see the space from a fresh perspective. We move through each room, inspecting our work closely, focusing on areas that often escape notice: under furniture, behind doors, and along baseboards.
This walkthrough is our opportunity to catch any last-minute imperfections and address them promptly. During this process, we might find a spot that needs a quick wipe or a surface that benefits from an extra polish.
Taking these few extra moments to refine our efforts guarantees that when we finally step back, the space is pristine and ready to be enjoyed in all its glory.
Conclusion
In wrapping up our builder cleanup, let's guarantee every detail shines. We've gathered the right supplies, sorted and disposed of debris responsibly, and tackled dust with HEPA vacuums and proper ventilation. Our windows are spotless, and stubborn stains have been treated with the right solvents. Now, let's conduct a meticulous final inspection, catching any overlooked spots, so the space is not just clean but truly pristine and ready for its next chapter. We've got this!